Introduction
From May 2020, Trackside3D has introduced common slicer settings based on the size of the model and the material being used. These should be used to tweak an existing calibrated and working 3D printer based on the model you are printing. Some of these settings may require tweaking on specific printers to get the best results. Settings may change from one release to another with Cura. We always use the latest stable release of Cura which at the time of writing was Cura 4.6.1.
Materials / Filament
We recommend the use of PLA and PETG filaments for all our models.
We test all of our models with both PLA and PETG using our common Trackside3D profiles. Some models are designed for use with specialty filaments such as Wood PLA, Metal Infused PLA, Transparent PETG, Reflective PLA, Translucent / Smoked PETG etc. Those models will print fine on regular PLA and PETG with the settings below, however they may require special settings for use with specialty materials. This information is typically provided either on our documentation or within the video demonstrating the model / effect on the oorail channel. Unless a model specifically mentions a specialty material, you can safely assume the model will print with both PLA and PETG.
We recommend PLA for most applications. PETG is easy to print with like PLA but does require higher temperatures. Some entry level 3D printers may not have sufficient power supplies to reach the temperatures required for PETG.
Preview Mode
We recommend that you use the preview mode to verify your settings after slicing but before you send / save the sliced model. The screenshot below shows the layer view preview at full print of our ARP signal box model. Here you can see how the brim will be printed and how the supports for the window / door frames will be printed. If the supports are too dense, they will be hard to remove, or if they aren't dense enough they might not provide enough support. Here they look sufficient but since this is a 20 hour print, it looks like the brim should be made bigger to prevent any bed adhesion problems. As settings and performance will vary from printer to printer slightly. We recommend using the preview mode so you can catch any problems before you print.

Cura Settings
By default not all the Cura settings maybe visible to you. To fix this simply click on the "three lines" next to the search settings and select either custom, advanced, expert or all.
Quality and Infill Settings
The quality settings determine how much detail (how fine) the 3D print is. This is controlled by characteristics of the line height. For a very finely detailed model with an FDM printer, you are looking at around 0.1mm to 0.12mm. However this depends on the capabilities of your printer. If you are doing a high quality print, make sure you set the line height to a value that is within the capabilities of your printer. We typically use 0.1mm for fine details.
For a good quality print, you would use around 0.16mm line height in the quality settings.
For a print where the details do not matter, perhaps a large tool or concrete base, you can use 0.2mm.
For a low quality printer, around 0.25mm. Be aware that if the line height is too large your print may separate between the layers if its outside the printers capability.
Infill settings are the other option that impacts the quality of the print. Infill is basically how much the walls of the 3D model are filled in. If you go with 100% then the walls will be 100% solid, if you go with 20% then they will only consist of 20% material. The pattern you choose for the infill determines how the "gaps" are created. The infill settings will increase or decrease the time of your print, and impact how much material is used.
For smaller models too much infill in very small areas can cause a malformed print. So for smaller detailed parts such as a relay case or point machine you might want to actually use 30% to 60% infill. We recommend adjusting the infill density and the infill pattern only, and allowing the other settings to be calculated unless you know what you are doing.
For larger models like buildings we typically use 40-60% infill density and a medium-quality line height such as 0.15mm. For large prints that are providing support, such as viaducts or bridges we may increase the density between 60% - 80%.
In many cases you will not notice much of a difference even increasing or decreasing these values by 20%. You should adjust based on your printer and your personal preference. These values are typically a trade off in quality / weight of the object and the cost in filament and time.
Initial Layer Settings
The initial or first layer is critical to a successful print. You can tweak these settings without impacting the look and feel of your model.
Initial Layer Height
You want to have a thicker initial layer height. If you are printing a very small model you will want to increase this slightly. If your layer height is 0.12 you may want to increase this on a very small (thin) model to 0.15 up to 0.2. On a larger model such as a wall or a building, you might want to increase this even as much as 0.25 or 0.3.
Initial Layer Line Width
We recommend that you adjust this as needed between 100% and 125%.
Initial Layer Speed
You will want a slower initial layer speed than the main print speed. We typically recommend a 20mm/sec initial layer speed. You can reduce this to 10mm/sec for Wood PLA.
Model Size Guidelines
The table below has a recommendation for bed adhesion, temperatures and supports based on the size of the model. A smaller model with a high degree of detail may require a slower print speed or adjusting the infill settings down or to a less complex pattern. These settings may require some adjustment depending on your printer and slicer. However they are a good rule of thumb to get started.
| Model Size | Material | Supports | Bed Adhesion | Nozzle Temp | Bed Temp |
| Small | PLA | Only if recommended | Skirt or Brim | 217 C |
50 C |
| Medium | PLA | Optional (Yes if recommended) | Brim | 217 C |
50 C |
| Large | PLA | Optional (Yes if recommended) | Large Brim | 217 C |
50 C |
| Small | PETG | Not recommended | Brim | 235 C |
70 C |
| Medium | PETG | Option (increase Support Z distance if used) | Brim | 235 C |
70 C |
| Large | PETG | Optional (increase Support Z distance and Support XZ distance) | Large Brim | 235 C |
70 C |
Bed Adhesion
For small and quick prints we recommend using the skirt option. The skirt option makes sure that the filament is flowing nicely before attempting the important first layer.
For medium to large prints, especially prints that will take a long time to print. We recommend using a slower bed adhesion speed, the brim option and a larger brim. If you have problems with bed adhesion over longer prints, you may want to look at printing onto blue painters tape, a glue stick covered bed, a magnetic bed or increasing the bed temperature for your material.
Our standard settings are Brim Width 10mm, Brim Count 20 and Brim only on outside. The skirt / brim speed should be 20mm/sec.
Retraction
If you are getting stringing prints or very noticeable layer lines, you should enable retraction in the Cura. We recommend using the following retraction settings:
Enable Retraction
Retract at Layer Changed - PETG (YES), PLA (Optional), Wood-PLA (YES)
Retraction Distance - 5mm
Retraction Speed - 45mm/sec
Retraction Extra Prime Amount - (optional)
Retraction Minimum Travel - 1.5mm
Combining Mode - Not Within Skin
Avoid Printed Parts When Traveling - Enabled / Ticked
Travel Avoid Distance - 0.625mm
Z Hop When Traveling - Optional (enable if nozzle hits print)
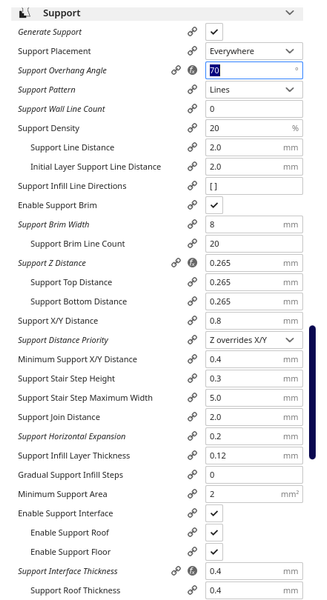
Supports
Many of our models are designed to print without supports. Support material adds cost to the print and can often be avoided through clever design. Support material can sometimes confuse the slicer into placing material that obscures or damages detailing. We have developed the following settings for producing easy to remove and very fine support material. Depending on the model you may need to decrease the support overhang angle to produce sufficient supports. You can use the "preview" mode in Cura to see where the supports are being created and adjust accordingly. Refer to the model print settings tab in our on-line shop to see if there are any per model suggestions.

Special Materials
For hybrid materials such as Wood PLA. We recommend printing at lower in-fill, slower speeds and higher temperatures. We recommend using between 10mm/sec and 20mm/sec for the initial layer, and a larger initial layer. For the rest of the layers we recommend a speed of about 30mm/sec for the best results. We recommend an initial printing temperature of around 204 C, a printing temperature of around 217 C and a final print temperature of around 208 C. Printing at lower temperatures and higher speeds can cause material to clog in the nozzle. Wood PLA is basically a mix of brown PLA plastic and very fine wood particles.
For further information on special materials, please refer to the product specific video on the oorail channel or visit our Trackside3D project page at oorail.